What is Leaking From My Car?

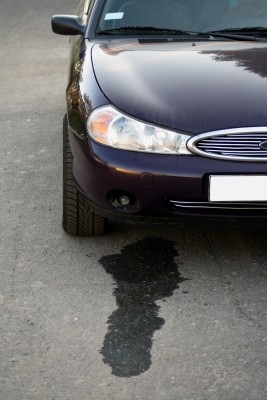
Car LeakingTo a car owner, there are few worse feelings than noticing a puddle of liquid underneath your car. Obviously something in your car is leaking, but just how big of a concern is the dripping fluid? Today, we take a look at some of the more common leaks that occur in your vehicle.

Common Car Leaks

Looking at the color of the puddle is one of the easiest ways to determine what’s leaking from your vehicle. Here are a couple of colors to look for.

Yellowish/Green – This is an indicator of a problem with your coolant or antifreeze. If your car can’t adequately stay cool, it could lead to major car problems down the road. This liquid could also be pink in color.

Light Brown/Black – This is a sign of an oil leak, and it may be coming from a variety of different places. It could be a sign of problems with your oil gasket, oil filter, oil coolant line or with your oil pressure.

Reddish Brown and Thin – This is a sign of a leak in your power steering, and time is your biggest enemy against a power steering leak. As cars age, you could spring a leak in your O-rings and seals. Simply replacing these seals can solve this problem.

Reddish Brown and Thick – A thick reddish stain is an indication that there’s a leak in your transmission. This is another issue that can cause serious problems if left untreated, so call a mechanic right away if you see a thick reddish substance under your vehicle.

Clear/Gray/Brown – This likely means their is a problem with your brake fluid, and can inhibit your ability to stop. Again, address this issue immediately.

Clear – A clear leak could also indicate that water is dripping from the radiator. If you just got back from a drive and you were running the air conditioner, the water could just be condensation from your radiator. If there’s a significant leak and you weren’t running your AC, you’ll want to swing into a mechanic.


What is Hydrophobic Glass?

Hydrophobic GlassHydrophobic glass, as the name implies for anyone versed in word origins, means that the glass is treated in such a way that it repels water. We’ve installed hydrophobic glass before, and although it’s more expensive than normal windshield glass, some drivers prefer the tempered glass. Below, we explain a little more about hydrophobic glass and how it works.

Self-Cleaning Glass

Technically speaking, the glass itself isn’t hydrophobic. All glass is essentially the same, but the hydrophobic glass is treated with a special self-cleaning coating. Self-cleaning glass is divided into two categories:

  • Hydrophobic
  • Hydrophilic

The two glass treatments are essentially the same in that they use the rain to clean themselves. Hydrophobic glass cleans itself by rolling rain droplets up the windshield, while hydrophilic glass pushes the water off in sheets to get clean. Additionally, hydrophilic coatings with titania can chemically break down absorbed dirt when exposed to the sun.

As you can see in the picture, hydrophobic glass works by forcing the water into tiny balls. The picture shows an example of flat glass treated with a hydrophobic coating. When you combine the treatment with angled glass, the water will go where it’s pushed, down with gravity or up and over the windshield when traveling at fast speeds.

Worth The Cost?

Many people want to now if it’s worth the cost to apply a hydrophobic coating to their windshield. It really comes down to personal preference, but like a lot of things, the more you spend, the better result you’ll see. There are some treatments that you can buy at your local auto center or at Walmart for about $50. These coatings work fine in the short term, but the coating will wear off quicker than most.

You could opt to step up to higher quality coatings, which run anywhere from $75-$200. These coatings will last longer, but for the price, it’s probably just as wise to have the treatment applied professionally. Mechanics preform this procedure rather regularly, and they’ll ensure a quality treatment is applied properly. Professionally installed treatments will likely cost just a little bit more, but they’ll last longer and you know you’re getting quality work.

If you’re considering getting the treatment done, or if you need any other work preformed on your windshield, give our Auto Glass department a call today!

Minnesota Among Cheapest States For Car Repairs

mechanicA review of national automotive data revealed that Minnesotans paid less than the average consumer to have work done on their car in 2011.

According to the data, Minnesotans paid an average of $323.51 for “check engine” related repairs, $10 less than the national average of $333.93. As you can see by the lists below, the most costly states for car repair are out west, while the cheapest states are located in the northeast and Midwest.

Five Most Expensive States For Car Repair

  1. Wyoming ($389.18)
  2. Utah ($378.54)
  3. California ($367.86)
  4. Montana ($364.29)
  5. Arizona ($362.65)

Five Least Expensive States For Car Repair

  1. Indiana ($283.95)
  2. Maine ($289.56)
  3. Wisconsin ($289.90)
  4. Iowa ($289.91)
  5. New Hampshire ($292.91)

The data breaks down the two main components of auto repair – Parts and Labor- to get a grand total. The average American spent $215.32 on parts and $118.61 on labor for check engine related repairs in 2011. Minnesota came in south of both of those numbers, as the average cost for parts was $211.68, and the average cost of labor was $111.63.

The most common repair associated with a check engine light was for an oxygen sensor replacement. While some people suggest drivers ignore oxygen sensor issues because vehicle performance will feel the same, oxygen sensor problems can reduce fuel economy by up to 40 percent. At that rate, a driver will quickly shell out more money with increased pit stops for gas than if they would have had the problem fixed when the check engine light first lit up.

Mechanics also noted that ignoring your oxygen sensor can lead to failure of the vehicle’s catalytic converter, which can cost hundreds or even thousands of dollars to fix.

Simply put, if your check engine light comes on, don’t make it worse by ignoring the issue. It can cost you a lot more money down the road.


Related source: CarMD.com

How to Extend the Life of Your Vehicle

CC image Wikipedia.orgWe’re here to help fix your car if something goes wrong, but the best way to extend the life of your vehicle is by practicing good driving and maintenance habits. Below, we discuss some simple things you can do to squeeze every mile possible out of your car.

On The Road – Certain driving habits can help extend the life of your car, and they can also help boost your fuel economy. This is especially important for new cars without many miles on them. Avoid flooring the gas pedal or slamming on the breaks when possible. It might be tempting to see if your flashy new car can hit 90 mph on the highway, but pushing your car’s engine to the limit is a recipe for disaster.

By giving yourself plenty of time to accelerate and to brake, you’ll avoid placing unneeded stress on your vehicle. The less stress, the better.

At The Pump – If you read our post on gasoline, you already know the best time of day to buy gasoline. Although the density of your fuel doesn’t necessarily equate to extending the life of your vehicle, there is another situation when you’ll want to avoid the pump.

If you notice a gas tanker is emptying its tank at the gas station, you’ll want to drive to another location to fill up. Sediments and other particles in the underground reserve can be stirred up when the tanker deposits its fuel. If those particles make their way into your fuel line, it can cause problems in your tank and filter.

At Home – Another way to care for your car is by doing minor maintenance on your own. Although you might not know how to fix a busted intake valve, odds are you can read the owner’s manual. Inside the manual you can learn about certain recommendations, like how much air you should put inside your tires and how to maintain proper fluid levels. With the help of an air hose and funnel, you can make sure some of the controllable aspects of your car are in optimal shape.

At The Shop – Doing minor maintenances on your own can keep your car running smooth, but it’s also important to have it regularly looked at by professionals. Mechanics know the best way to replace integral components like timing belts or batteries, and they can spot other issues that may be overlooked by the untrained eye.

Some common maintenance habits that can easily be preformed by your local mechanic include:

  • Tire rotation
  • Filter changes
  • Diagnostics testing
  • Alignment checks 

Check back each week for more tips on how to properly care for your car.

Related source: Reader’s Digest

How Often Should I Check My Car’s Fluid Levels?

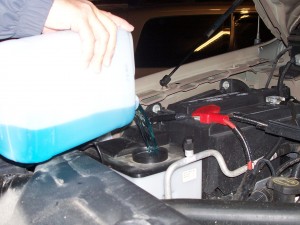
Car FluidsOther than gasoline, most drivers don’t give their car’s fluid levels a second thought on a daily basis. As we’ve said before, the key to extending the life of your vehicle is to prevent breakdowns from occurring, as opposed to fixing the problem after it happens. While some fluids aren’t as integral to maintaining peak performance, it’s a good practice to routinely inspect your fluid levels to keep them in an optimal state. Below, we explain how often you should check and change your fluid levels.

Regular Fluid Checks

Oil – You can check your oil level and color with the help of a dipstick. Insert a clean dipstick into the oil tube and slowly remove it. Most dipsticks will have an indicator to determine if you’re above or below the recommended amount of oil. If you’re below the minimum amount, or if the oil is black, you’ll want to have it changed.

Final verdict: Change every 5,000-7,000 miles.

Windshield Wiper Fluid – Motorists use a significant amount of windshield wiper fluid during the spring months as melting snow is constantly being sprayed up onto the windshield. Windshield wiper fluid isn’t integral to maintain peak performance, but you won’t want to be out of fluid if a passing vehicle sprays your car with mud.

Final verdict: Pop your car’s hood every month to give your windshield wiper fluid container a quick check. If it’s less than ¼ full, top it off.

Moderate Checks

Brake Fluid – A dipstick is also handy for checking your brake fluid level. Reference your owner’s manual to determine the procedure for checking your brake fluid to ensure it is at the proper level.

Final verdict: You probably only need to check your brake fluid levels once a year, and most mechanics recommend changing it every 30,000 miles or three years.

Coolant – Coolant helps make sure your engine doesn’t overheat while driving. You can easily check your coolant levels by checking under your hood and referencing your owner’s manual.

Final verdict: Coolant should be changed every 30,000 miles or every three years, whichever comes first.

Transmission Fluid – You can use your dipstick to check your transmission fluid levels, and you’ll want to have service done immediately if you realize you are running low. You’ll also want to make sure the fluid is the right color. Transmission fluid is clear pink, so if you notice any darkness in the liquid you’ll want to get it changed.

Final verdict: You should check your transmission fluid once a year, and most mechanics recommend you change it every 30,000-50,000 miles.

Longer Checks

Battery Fluid – Most batteries have a pretty good shelf life, but you should still keep an eye on the color of your battery’s fluid so you know it’s still in good shape. Most batteries have a condition indicator on the top of the battery that changes color based on the fluid quality:

  • Blue/Green: Good
  • Red: Add distilled water
  • White: Needs to be changes

Final verdict: Change your battery every 3-5 years.

Related sources: Yahoo, NapaOnline.com

When Should you Replace your Brake Pads and Rotors?

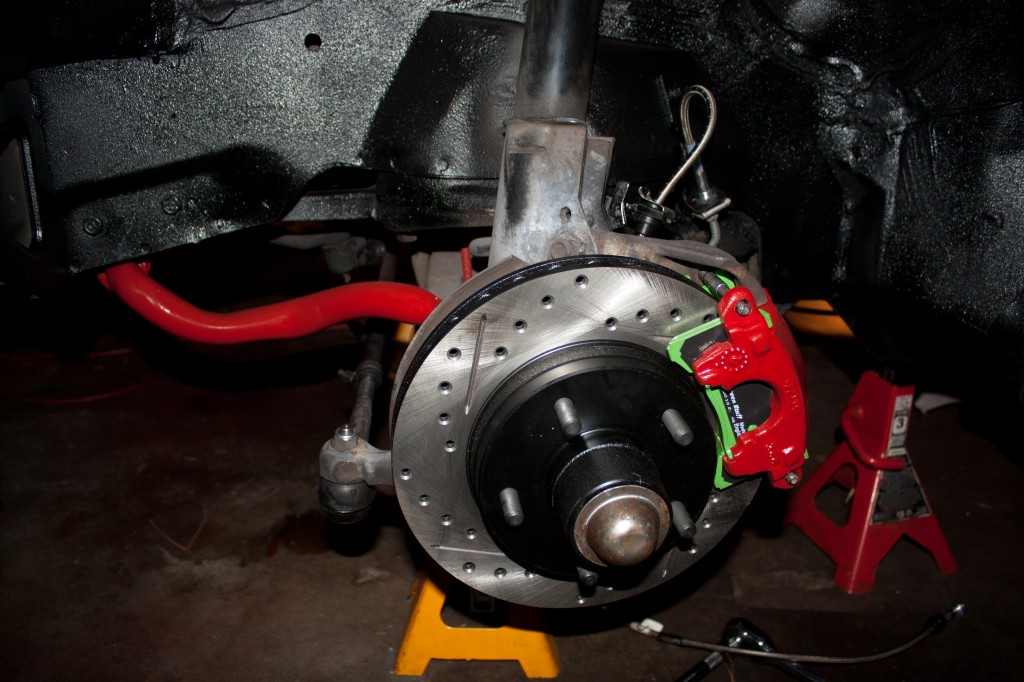
CC image IROC Brake Upgrade by Nick Ares on FlickrYour brakes are arguably the most important part of your vehicle because they regulate your speed and help prevent accidents. Anyone who has had brake trouble can tell you how important it is to address any problems as quickly as possible. If your car takes a long time to come to a complete stop, or if you hear grinding noises coming from your car when you brake, you might have broken or worn out brake pads and rotors.

How do brake pads and rotors work?

When you apply the breaks in your vehicle, you begin a process that slows the momentum of your car. The two main components in this process are your:

  • Break pads; and
  • Disk break rotors

Different vehicles require different types of break pads and rotors, but they all serve the same function. As you break, your break pads clamp down on your spinning rotor. The kinetic energy is converted into thermal energy as your break pads clamp onto the rotors to bring the car to a stop. Your car is essentially turning forward momentum into heat.

By picturing this process in your head, you can understand why it’s better for you to come to a slow stop than to slam on your brakes. A slow, gradual stop will create less heat in your brake system. Similar to when we discussed proper tire inflation, systems wear out quicker when they operate at a higher temperature. If you’re constantly slamming on your brakes, you’re exposing them to intense thermal energy.

Types of rotors

There are a few different styles of rotors available for your vehicle. Although there are rotors specially designed for performance vehicles (like racecars) and heavy vehicles (like 18-wheelers or fire trucks), we’ll focus on the two main rotors that are used among typical drivers.

  • Drilled rotors are probably the most common type of rotor on the road. A drilled rotor has small holes drilled into the side. These holes help regulate the thermal energy produced during braking, which keeps your rotors operating at a cooler temperature. Although they help get rid of excess heat, drilled rotors are weaker than other types of rotors because there are holes in the disc. Drilled rotors can crack after being exposed to long-term stress.
  • Slotted rotors are the other main type of rotor used in passenger cars. A slotted rotor has small divots in the disk that help regulate temperature. Because the divots aren’t full blown holes, slotted rotors tend to be more durable than drilled rotors. That being said, slotted rotors tend to wear down your brake pads faster than their drilled counterparts, so most people opt for drilled rotors.

How often should you replace brake pads and rotors?

There are a lot of different answers out there for when you should replace your break pads and rotors. You should consult with your trusty auto mechanic when you’re having either replaced, as they can estimate how long certain pads and rotors will last. As a general rule, break pads should be replaced every 10,000-20,000 miles, while rotors should usually be replaced every 50,000-70,000 miles.

With that said, it is imperative to get your brakes checked the first time you hear grinding or crunching while braking. The noise usually mean your break pads are worn and need to be replaced. If you continue to drive with worn pads, your rotors can become damaged. By replacing your pads before they become too worn, you can actually extend the life of your rotors, which will save you money.

Related sources:  PrimeChoiceAutoParts.com, HowStuffWorks.com

Why Does my Car Pull to the Right or Left?

Reasons your Car Pulls

Ever get the feeling that your car is dragging or “pulling” to the left or right? This could be the result of several different factors, including:

  • Vehicle alignment. Alignment keeps your tires parallel with one another and even with the ground. If the alignment is off, it can cause a car to pull.
  • Brake Hose. The brake hose distributes brake fluid to your tires. If it gets clogged, fluid is dispensed unevenly to the tires, causing a car to pull as a result.
  • Tires. Over time your tire tread will wear out. If you don’t help distribute the wear evenly by rotating your tires on a regular basis, one will inevitably wear out quicker than the others. Low tire pressure can also be a cause of pulling.

A car that pulls to the right or left is more difficult to control as it requires the driver to constantly correct the pull. This can put an increased burden on the driver and take their focus off of driving safely.

Cars designed for driving on the right side of the road are manufactured to pull slightly to the right. This is to prevent the car from drifting into oncoming traffic if the driver falls asleep at the wheel. That being said, this should only be a very slight pull to the right. If your car is pulling significantly, it’s a good idea to get it checked.

How to Correct the Pull

There are a few home remedies you can try to stop the pull, such as:

  • Switching your front tires is a good test to see if the problem lies in the tires. Only rotate your tires if you know exactly what you’re doing.
  • Check your tire pressure to make sure one tire isn’t significantly lower than another.

If none of these tests work or you’re uncomfortable rotating your tires, it’s best to bring your vehicle into an auto repair shop and have an auto technician take a look. An experienced mechanic can examine your vehicle, identify the cause of the pulling, and fix the issue.

Why Pay for Car Diagnostics?

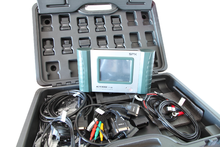
Car Diagnostics - Wiki CCVehicle diagnostic checkups are often ignored by car owners, but are very important to the long life of your car.

What are Vehicle Diagnostics?

Back in the day, it was up to the individual mechanic to determine what was wrong with your vehicle. Now Electronic Control Units (ECUs), which are present in all modern cars, help mechanics figure out and fix vehicle issues quickly.

When the ECU in your vehicle detects a problem, it will turn on the “check engine” light. A mechanic can then plug into the vehicle and download the error report recorded by the ECU.

It’s true that anyone who knows what they’re doing can plug in and download the ECU error report. So why is it a good idea to bring your vehicle in when the check engine light pops up?

Why Bring your Car in?

Even if you know what’s wrong with your vehicle, fixing the problem is another thing entirely. An experienced mechanic can interpret the error report and determine the best solution for fixing the problem.

There are also certain issues that won’t cause the “check engine” light to go off. A mechanic can examine your vehicle inside and out and get you back on the road in no time!

When Should you Change your Oil?

There is a lot of confusion about how often you need to change the oil in your vehicle. Every 3,000 miles is a common benchmark that many people stand by. The truth is that the answer varies greatly based on several factors.

Why do you Need to Change your Oil at All?

Your engine requires oil to run smoothly. Since the engine is arguably the most important part of your vehicle (after all, the car won’t go anywhere without an engine), it’s important to keep the engine happy by changing the oil when necessary. This will keep the engine running smoothly and make it last longer.

Should you Trust the Windshield Sticker?

If you get your oil changed at an auto shop, the technicians will often place a small sticker on your windshield with the date of the oil change and when to come back in for another change. The most common interval recommended is 3,000 miles. While older vehicles may very well need to have their oil changed every 3,000 miles, newer models can generally last longer before an oil change is recommended.

Consult your Vehicle Owner’s Manual

The most important thing you can do when considering when to change your oil is to consult your vehicle owner’s manual. Every car is different and there is no universal answer to the question – “How often should I change my oil?” The owner’s manual will have instructions from the car’s manufacturer on when to change the oil.

Other Factors

In addition to the number of miles driven, there are several other factors that can impact when an oil change is necessary, such as:

  • Towing
  • Driving in off road conditions (gravel, dusty roads)
  • Driving in cold weather
  • Taking frequent short trips (less than 10 miles)

Top 4 Car Repairs you Shouldn’t Skip

It’s a fact of life that cars break down over time. But if you take good care of your vehicle and keep up with routine repairs and maintenance, you can extend the life of your vehicle. Most people don’t even think about vehicle maintenance until something goes wrong. Following repair procedures can also help avoid a vehicle breakdown. With that in mind, here are 4 car repairs that you shouldn’t skip.

1. Oil Change

There is a lot of confusion about how often you should change the oil in your car. Every 3,000 miles? Every 5,000 miles? The truth is there is no universal answer to this question since every car is different. When to get your oil change depends on numerous factors such as:

  • Driving conditions
  • Driving frequency
  • Vehicle age

But the bottom line is that your car’s engine needs oil to run smoothly. It’s absolutely essential to get your oil changed in order to keep your vehicle running at top performance levels.

2. Tire Check & Rotation

Since the weight of any vehicle is not distributed evenly across all 4 wheels, certain tires will wear out quicker than others. This is why it’s important to have your tires rotated. Your vehicle owner’s manual should have instructions on when and how exactly to rotate your tires. Or you can bring your car in and have your tires checked and rotated by an auto professional.

3. Brakes & Brake Pads

Brakes are one of the most essential elements of your vehicle. Checking your vehicle’s brakes is an obvious safety precaution. An auto technician can examine your brakes and brake pads and catch any flaws before they break down while you’re driving.

4. Fluids

This includes brake fluid, transmission fluid, and coolant – all important for keeping your vehicle running efficiently. These fluids can run low or deteriorate over time. Make sure you keep an eye on your fluid levels and ask an auto mechanic if you are unsure about anything.